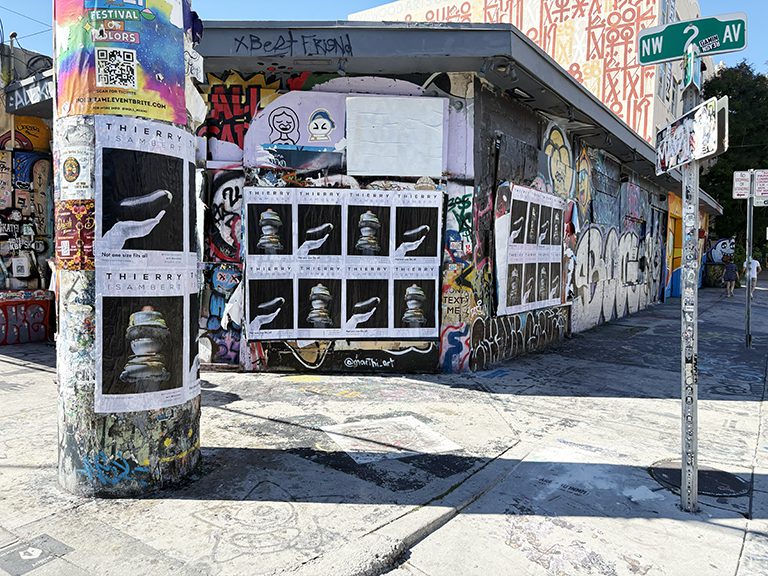
Wheatpasting looks simple from the outside. Paste and paper. But the technical details determine whether your poster looks professional for three weeks or peels off the wall in three days. Here is exactly how to do it right.
Wheatpasting is a skill. It looks straightforward from the outside, which is why a lot of first-time poster campaigns end up with peeling, bubbling, uneven, or short-lived placements. The technique matters. The materials matter. The surface preparation matters. And the sequence of steps matters. Do all of those things correctly and your posters will look clean and professional for weeks. Shortcut any of them and you will be looking at lifting corners and wrinkled paper within days.
At American Guerrilla Marketing, we have installed tens of thousands of wheatpaste posters across New York City and other major markets. Our crews have developed the technique over years of real-world installation across every type of surface, in every type of weather condition, at every scale from 11×17 small-format to multi-sheet full-wall installations. This guide is our practical knowledge base for how wheatpasting works at a technical level.
We are writing this because we believe in the value of the format and we want everyone who uses it to do it well. Whether you are a DIY first-timer planning a small neighborhood campaign or a brand manager evaluating what professional wheatpaste installation looks like versus amateur attempts, this guide gives you the ground-level technical knowledge to understand the difference.
Understanding Wheatpaste Adhesive: Traditional vs. Commercial
The name “wheatpaste” comes from the traditional adhesive recipe: wheat flour cooked in water until it forms a thick, sticky paste. This is the original version of the adhesive that gives the format its name. It has been used for centuries. It works. But it has limitations that have led professional campaigns to move toward commercial adhesive compounds for most applications.
Traditional Flour Paste: How to Make It
Traditional wheatpaste is made by mixing wheat flour (or all-purpose flour) with cold water in a 1:4 ratio, then heating the mixture while stirring until it thickens to a paste consistency. The heating process activates the starches in the flour, creating the adhesive properties. Let it cool before use.
The basic recipe works. But traditional flour paste has several disadvantages in professional campaign applications. It is susceptible to mold growth in humid conditions. It has inconsistent bonding strength depending on the flour used and the cooking process. It breaks down more quickly in rain and high humidity than commercial alternatives. And it requires preparation in advance, since it needs to cook and cool before it can be used. For a DIY poster run of 20 placements, flour paste is fine. For a professional campaign of 500 placements requiring consistent results across multiple crews over multiple days, commercial adhesives are the right choice.
Commercial Adhesive Compounds: What We Use
Professional wheatpaste campaigns today predominantly use commercial cellulose-based adhesive compounds, modified methyl cellulose products, or specialty outdoor paste formulations designed for exactly this application. These products offer several advantages over traditional flour paste.
More consistent bonding strength across different surface types
Better moisture resistance, extending poster lifespan in wet conditions
Faster and more uniform drying times
No preparation cooking required, just mix with water
No mold risk from organic matter in the paste
Longer working time in the container before drying
For most professional campaigns, commercial adhesives are the right choice. They produce better, more consistent results than traditional flour paste, and the cost difference at campaign scale is negligible.
Mixing Ratios and Consistency
The right paste consistency is thick enough to adhere the poster to the wall but thin enough to spread easily with a brush. Think of heavy cream. Not as thick as pudding, not as thin as milk. If your paste is too thick, it pulls the poster as you try to smooth it, creating bubbles and wrinkles. If it is too thin, it does not create enough adhesive bond and the poster will lift as it dries.
Commercial products come with mixing instructions. Follow them. Then adjust slightly based on the surface type. More porous surfaces benefit from slightly thicker paste. Very smooth surfaces work well with standard consistency. When running a large campaign across multiple crews, batch consistency is important. Paste that is mixed slightly differently by different crew members can produce variable results across the installation. Brief your crews on the target consistency and check paste quality at the start of each day’s work.
Surface Preparation: The Step Most People Skip
The single most common reason for premature poster failure is inadequate surface preparation. Many first-time wheatpasteers skip this step entirely, apply paste directly to whatever surface they encounter, and wonder why their posters are lifting within days. Surface preparation is not optional. It is the foundation of a durable placement.
Assessing Surface Suitability
Not every surface is suitable for wheatpaste placement. Ideal surfaces are smooth, stable, and clean. The best surfaces include painted concrete with stable paint film, smooth-painted brick, smooth-painted metal with intact paint, and smooth-painted plywood or wood sheeting.
Surfaces that produce poor results include peeling or flaking paint (the paste bonds to the top paint layer, which then releases from the underlying surface), very rough or highly textured surfaces that create large air pockets under the poster, surfaces that are wet or damp at installation time, very dirty or oily surfaces where contaminants prevent proper adhesion, and surfaces that are actively deteriorating or powdering.
Surface Cleaning
Before applying paste to any surface, brush or wipe away loose dust, dirt, and debris. For surfaces with significant accumulated grime, a quick wipe with a damp cloth helps. Let wet surfaces dry before applying paste. Removing loose material from the surface dramatically improves adhesion quality and longevity. A crew that takes two minutes to clean a surface before pasting will produce placements that outlast by weeks those placed on unprepared surfaces.
Pre-Wetting Dry or Porous Surfaces
Very dry or highly porous surfaces can absorb paste too quickly, preventing the poster from achieving a full-surface bond before the paste dries. Pre-wetting these surfaces with a thin layer of diluted paste or plain water before applying the installation paste coat helps by slowing the absorption rate and allowing better bond formation. This is a particularly important step for campaigns running in desert climates like Los Angeles and Phoenix where surface dryness is extreme.
AGM Field Note: Surface prep investment pays off. Five minutes of surface preparation before a placement can add two to three weeks to the poster’s lifespan. Crews that skip surface prep consistently see shorter lifespans and more edge-lifting. Crews that take surface prep seriously see dramatically better durability in all weather conditions.
Step-by-Step Wheatpaste Installation Process
Here is the complete installation sequence used by professional wheatpaste crews. Every step in this sequence matters. Do not skip any of them.
Step 1: Gather Materials
Before you start, have everything ready. You need: mixed paste in a sealed container or bucket, paste brushes or rollers appropriate for the poster size (4-inch brushes for small format, 6-9 inch rollers for large format), a clean cloth or sponge for wiping spills, your printed poster stock, and optionally a spray bottle with water for surface pre-wetting. Having everything within reach before you start prevents interruptions that compromise installation quality.
Step 2: Assess and Clean the Surface
Walk the placement surface. Identify any loose paint, debris, or contamination. Brush or wipe it away. Identify any areas with particularly dry or porous texture and note them for pre-wetting. Make a mental note of the wall’s dimensions so you know how your poster format will fit and orient.
Step 3: Apply First Paste Coat to Wall
Apply an even coat of paste to the wall surface in the area where the poster will be placed. The paste coat should cover a slightly larger area than the poster itself, including a 2-3 inch margin on all sides. Apply with steady, even brush strokes or roller passes. Ensure coverage is complete with no dry spots.
Step 4: Position the Poster
With the wall paste still wet, position the poster against the wall. For large-format posters, have a second person help. Start from the top edge and work downward, pressing the poster into the paste as you unroll or unfold it against the wall. Get the position right before starting the smoothing process, because repositioning after initial contact degrades both the paper and the paste bond.
Step 5: Smooth the Poster
Working from the center of the poster outward toward the edges, smooth the poster against the wall surface using your hands, a smoothing tool, or a clean roller. The goal is to eliminate all air bubbles and ensure full contact between the paper and the paste layer. Work methodically. Large air bubbles that are not removed at this stage will not disappear as the paste dries. They will remain as permanent bubbles or wrinkles in the finished placement.
Step 6: Apply Top Coat Paste
This is the step that most amateurs skip and most professionals consider non-negotiable. Apply a complete coat of paste over the face of the installed poster. Start from the center and work outward. Ensure the edges and corners receive extra paste coverage, as these are the areas most susceptible to lifting. The top coat seals the poster, prevents edge lifting, and gives the finished placement a professional-looking semi-gloss surface.
Step 7: Final Edge Check
After applying the top coat, run your fingers along all four edges and corners of the poster. Press down any areas that are not fully bonded. Apply additional paste to any spots where the top coat has been absorbed without full coverage. This final edge check takes 30 seconds and significantly extends placement longevity.
Step
Action
Why It Matters
1
Gather materials
Interruptions during installation compromise quality
2
Assess and clean surface
Surface quality determines placement longevity
3
Apply wall paste coat
Creates the adhesive bed for poster bonding
4
Position poster
Alignment cannot be corrected after bonding starts
5
Smooth poster flat
Removes air bubbles that cause lifting and wrinkling
6
Apply top coat paste
Seals edges, prevents lifting, professional finish
7
Edge check
Catches and corrects lifting before drying
Paper Stock Selection for Wheatpaste Campaigns
Paper stock is one of the most important variables in wheatpaste campaign quality and longevity. Not all paper types are appropriate for outdoor paste-up application.
Uncoated Bond Paper
Uncoated bond paper is the standard recommendation for most wheatpaste applications. It absorbs paste adhesive well, creating a strong mechanical bond with the adhesive layer. It is relatively resistant to tearing when wet, which matters during the smoothing process. It is available in a range of weights that offer different durability trade-offs.
Heavier weight uncoated papers (80 lb cover weight and above) produce more durable placements and are more resistant to surface texture telegraphing through from the wall. Lighter weight uncoated papers are less expensive and acceptable for short-duration campaigns but show more wear under challenging conditions.
Coated Papers
Glossy and semi-gloss coated papers are generally not recommended for wheatpaste applications. The coating prevents paste from bonding properly to the paper, resulting in weaker adhesion and more frequent lifting. If design requirements make a coated stock preferable for color fidelity, we recommend a light coating weight rather than a heavy gloss and always run a test application before committing to a full print run.
Synthetic Papers
Synthetic paper stocks can be extremely durable in wet conditions but have variable adhesive performance depending on the specific product and adhesive combination. We have had success with certain synthetic stocks in high-moisture environments but always recommend a test placement before committing a campaign to any synthetic stock that has not been used with the specific adhesive compound being deployed.
Large Campaign Logistics: Running Multi-Location Installations
The technical installation process described above scales differently when you are running a campaign of 500 or 1,000 placements across multiple neighborhoods. The per-placement technique remains the same, but the campaign logistics require a different level of planning and coordination.
Crew Sizing and Route Planning
A single experienced installer can typically place 80 to 120 posters in a standard 24×36 format during an eight-hour day in a concentrated neighborhood. For larger formats or more dispersed location plans, that rate decreases. For multi-crew campaigns, route planning is critical. Each crew needs a clear location list with specific addresses or intersections for every placement, organized in the most efficient geographic sequence to minimize travel time between locations.
We typically divide large campaigns into neighborhood zones, with one crew per zone responsible for all placements in their assigned area. This approach eliminates the travel time that kills efficiency when crews are crossing cities between placements. A crew working a concentrated six-block zone will outperform a crew covering a city-wide list at the same poster count every time.
Material Management at Scale
Managing paste, paper, and tools across a large multi-crew campaign requires logistical discipline that first-time campaign managers typically underestimate. Paste needs to be pre-mixed in quantities appropriate for each crew’s daily workload, transported in sealed containers that maintain working consistency, and refreshed as it dries out during the workday in hot or dry conditions. Paper needs to be pre-sorted by location and format to avoid confusion during installation.
We pre-stage all materials for each crew at the start of each installation day. Crews receive their route list, their poster inventory sorted by location, their paste supply, and their tools in a single handoff before they begin work. Mid-day material shortages are a campaign efficiency killer that proper staging eliminates.
Quality Control During and After Installation
Professional campaign quality control operates at two levels: during installation and after installation.
During installation, crew supervisors circulate through the installation zones and spot-check placement quality. They look for bubbles that were not smoothed out, corner lifting that indicates insufficient top coat, misaligned placements, and surface condition issues that the installation crew should flag for supervisor review before placing. Issues caught during installation can be corrected. Issues missed during installation become photo documentation problems and campaign quality failures.
After installation, every placement is photographed. Photographs serve as both quality verification and documentation of campaign delivery. We review the photo documentation systematically to identify any placements that do not meet our quality standards. Substandard placements are flagged for refresh. Placements that were compromised by surface conditions get noted in the campaign report with an explanation of what happened and what was done to address it.
The photo documentation also creates a before-and-after campaign record. By photographing placement locations before installation and comparing those shots to the installed placement photos, we can document the transformation that the campaign creates in each location’s visual environment. This documentation is useful for client presentations, campaign retrospectives, and marketing case studies.
Wheatpaste Campaign Planning: From Brief to Installed Poster
If you are planning a wheatpaste campaign rather than a single DIY placement, the technical installation knowledge in this guide is only one part of what you need. Professional campaign planning involves several additional elements.
Location Scouting
Scout your locations before printing. Verify that proposed wall surfaces are suitable for the installation quality you need. Photograph each location from the expected viewing angle and distance to check how the poster format will look in context. A design that looks great in the file can look wrong at a specific location due to scale, surrounding visual competition, or wall color.
Print Specification
Produce posters at the correct size, on the correct paper stock, with the correct color profile for outdoor display. Get proofs before committing to a full print run. Review proofs in outdoor light conditions rather than under office fluorescent lighting. Colors shift between indoor and outdoor viewing conditions in ways that affect campaign visual quality significantly. A proof that looks great under your studio lights may look very different on a wall in midday sun.
Post-Installation Documentation
Photograph each placement immediately after installation. Collect location data for every poster. Review the photo documentation for any quality issues that require follow-up. Identify any locations where surface conditions produced a lower-quality result than expected and flag them for mid-campaign refresh consideration. Deliver the complete photo report and geo-tagged placement maps to the client promptly after installation is complete.
Frequently Asked Questions About Wheatpaste How To
Professional Wheatpaste Installation From AGM
If this guide has helped you understand the complexity involved in professional-quality wheatpaste installation, you understand why brands that care about campaign quality work with experienced installation crews rather than managing DIY campaigns at scale.
At American Guerrilla Marketing, we bring every element of professional wheatpaste execution to every campaign we run. The right paste, the right paper, the right surface preparation, the right installation technique, and the right locations. The result is campaigns that look professional, last as long as the market conditions allow, and put your brand in front of real audiences in the real world. Every placement gets photographed. Every campaign delivers a complete photo report and geo-tagged placement maps so you can see exactly what went up and where.
Call us at (646) 776-2770 or email [email protected] to talk about your campaign. We will give you an honest assessment of what is possible and what it takes to execute it correctly.
Written by the team at American Guerrilla Marketing. AGM runs professional wheatpaste poster campaigns in New York City, Los Angeles, Chicago, and major markets nationwide.
Frequently Asked Questions
Can I use regular glue instead of wheatpaste?
Standard PVA glue (white craft glue) diluted with water is an acceptable substitute for traditional wheatpaste and is used by some practitioners. It has similar bonding properties to commercial methyl cellulose compounds and produces reasonable results. However, it can become brittle when dried and may crack in cold temperatures. Commercial adhesive compounds are preferred for serious outdoor campaign applications.
How do I prevent bubbles when applying large format posters?
Start smoothing from the center of the poster and work outward toward the edges in overlapping strokes. Resist the urge to smooth randomly. The center-out technique pushes air toward the edges where it can escape. On very large format posters (48×72 and larger), having a second person hold the opposite edge while you smooth significantly reduces bubble formation.
What happens if it rains right after I install a poster?
Rain immediately after installation, before the paste has dried, is the worst-case scenario. It can wash away the paste bond before it sets, causing the poster to lift or slide. In wet weather, use commercial adhesives with water-resistance additives and ensure a complete top coat application before any rain exposure. If rain is forecast within four hours of planned installation, reschedule if possible.
How long does wheatpaste take to dry?
Drying time depends on paste type, paste thickness, humidity, temperature, and surface porosity. In standard conditions at room temperature with moderate humidity, a properly applied wheatpaste placement typically achieves initial set in two to four hours and full dry in eight to twelve hours. High humidity extends drying time. High heat accelerates it. Do not subject new placements to water or mechanical stress until fully dry.
Can I wheatpaste on painted brick?
Yes. Smooth-painted brick is a workable wheatpaste surface. The texture of the brick telegraphs through the paper to some degree, which affects the visual quality of the placement slightly. Heavier-weight paper stocks minimize this telegraph effect. Apply extra paste in the recessed mortar joints and smooth the poster thoroughly to achieve good adhesion across the textured surface.
Why do my posters always peel at the corners?
Corner peeling is the most common wheatpaste installation problem. It almost always results from insufficient top coat coverage at the corners and edges. The top coat paste at corners tends to run off or thin out if not applied carefully. Apply extra top coat to all four corners and press them firmly into the wall after applying the coat. A corner that has been double-coated and firmly pressed will hold significantly longer than one that received only standard coverage.
Is it better to do a campaign myself or hire a professional crew?
For a small personal project or very limited campaign, DIY is feasible with the techniques in this guide. For a campaign of 100 placements or more where location quality, installation consistency, and campaign efficiency matter, professional crews are the better choice. Professional crews install faster, produce more consistent quality, have access to better location networks, and can manage a campaign at scale that a DIY team cannot match. The cost per placement of professional installation is lower than most people expect when the math is done correctly.
Can wheatpaste damage the surface it is applied to?
On most stable painted surfaces, wheatpaste does not cause lasting damage. The adhesive bonds to the top paint layer but does not penetrate or damage the underlying surface. On surfaces with unstable, flaking, or deteriorating paint, the paste application and removal can accelerate paint loss that was already occurring. We assess surface stability before every placement and avoid surfaces where paint is actively failing.