
September 19, 2023 Wild Wheat Paste Posting Posting and Wheatpasting
Wheat paste is a versatile and cost-effective adhesive for poster installations, providing excellent adhesion without causing damage or leaving residue behind. Are you looking to add a unique touch to your art installations or street photography? Wheat pasting posters can be an excellent way to showcase your creativity and make a statement. In this step-by-step guide, we’ll walk you through the process of wheat pasting posters, from preparing the surface to adding those finishing touches. Get ready to dive into the world of wheat paste art and learn some valuable tips and tricks along the way!
Wheat Paste, Posters, Bucket of Water
To successfully wheat paste posters, you will need a few essential materials. Firstly, prepare the wheat paste mixture by combining flour and water in a bucket. Next, ensure you have a sturdy surface or wall on which to apply the posters. Lastly, gather your posters and keep them handy for the application process.
Recipe for Making
Wheat paste is a versatile and cost-effective adhesive for poster installations, providing excellent adhesion without causing damage or leaving residue behind.
Making your own wheat paste is a simple process that only requires a few ingredients. To make wheat paste, combine equal parts water and flour in a pot and heat it over low heat until it thickens to the desired consistency. Stir continuously to prevent lumps from forming. Once cooled, your homemade wheat paste is ready to be used for poster installations.
Where to Buy Pre-Made
If you prefer not to make your own wheat paste, pre-made options are readily available for purchase. Many art supply stores and online retailers offer pre-made wheat pastes specifically designed for poster applications. Look for products labeled as “wheat paste” or “wallpaper adhesive,” as these will provide the necessary strength and durability.
Benefits of Using
Using wheat paste has several advantages when it comes to poster installation. Firstly, its sticky nature ensures excellent adhesion between the posters and surfaces like walls or boards. Additionally, wheat paste is easily removable without causing damage or leaving residue behind, making it ideal for temporary installations or changing displays frequently. Moreover, this cost-effective solution allows artists on any budget to create impactful street art projects with ease while maintaining an environmentally friendly approach by using natural materials instead of synthetic alternatives.
Choosing the right type of posters is crucial for effective communication. Consider factors such as size, material, and target audience when making your selection. Designing effective poster layouts involves creating a clear visual hierarchy, using eye-catching colors and fonts, and organizing information in a logical manner. Printing high-quality posters ensures that your message is delivered with sharpness and clarity. Use professional printing services to achieve vibrant colors and crisp details that will capture attention.
Pros and cons of using a brush or roller:
Using a brush allows for more precision in tight spaces, but can leave streaks if not applied evenly. A roller covers larger areas quickly, but may not reach into crevices as well.
Choosing the right size and material for your brush or roller:
For small areas or details, use a smaller brush with fine bristles. Larger brushes work best for bigger surfaces. Select rollers with the appropriate nap length – shorter naps for smooth walls and longer naps for textured surfaces.
Tips for applying even coats with a brush or roller:
When using a brush, apply thin coats in one direction to avoid visible strokes. For rollers, load them evenly and use long sweeping motions to achieve uniform coverage. Keeping the tools clean between applications ensures smoother results.
Selecting an appropriate bucket size is crucial when wheat pasting posters. A larger bucket allows for a higher quantity of wheat paste, ensuring you have enough to cover all your posters without interruption. On the other hand, a smaller bucket can be more manageable and prevent wastage if you are working on a smaller project.
Using a clean bucket is essential to avoid contamination in your wheat paste mixture. Any dirt or residue left in the bucket can affect the quality of your paste and potentially ruin your finished posters. Make sure to thoroughly wash and dry the bucket before starting your project.
When storing leftover wheat paste, it is important to use a sealed bucket to maintain its consistency. Exposure to air or heat can cause the paste to dry out or spoil quickly, rendering it unusable for future projects. By securely sealing the container, you can preserve your unused wheat paste for extended periods and ensure its effectiveness when needed again.
Determining the ideal water-to-wheat-paste ratio is crucial for achieving the perfect consistency. Using warm water not only helps to dissolve the wheat paste more effectively, but also ensures a smoother and easier application. The importance of using filtered water should not be underestimated as it prevents clumps and enhances the overall quality of your wheat paste mixture.
Advantages of using sponges over cloths include their ability to hold more water, making them efficient for cleaning large surfaces. However, sponges can harbor bacteria if not properly cleaned and maintained. On the other hand, cloths are reusable and easier to clean than sponges. To maintain reusable sponges, rinse them thoroughly after each use and soak in a mixture of hot water and vinegar to disinfect. For prolonging the lifespan of cloths, it is important to allow them to dry completely before storing to prevent mold or mildew growth.
Preparing surfaces before pasting posters is crucial to ensure a long-lasting and seamless application. When choosing a suitable wall material, opt for sturdy options such as brick or concrete that can withstand the weight of the poster and provide a secure hold. Avoid delicate surfaces that may be damaged by adhesive, preventing any potential harm.

Leaving the poster undisturbed in a well-ventilated area allows for proper air circulation, promoting faster drying of the paste.
Leaving the poster undisturbed in a well-ventilated area allows for proper air circulation, promoting faster drying of the paste. Begin by thoroughly cleaning the wall with a gentle detergent to remove any dirt or debris. Next, address any uneven surfaces by using sandpaper or a putty knife to smooth them out. Finally, apply a sizing solution to the wall to create an optimal adhesive surface for your posters. With these steps completed, you can ensure that your wheat pasted posters will adhere smoothly and effectively to the wall, enhancing their longevity and visual impact.
Removing dirt and debris is the first step in cleaning the wall. Use a broom or vacuum to eliminate loose particles before moving on to the next step.
Washing with mild soap and water is an effective way to clean the wall. Mix a small amount of mild soap with warm water, then use a sponge or cloth to gently scrub away any stains or grime.
For stubborn stains, using a scrub brush can help remove them effectively. Apply some pressure while scrubbing in circular motions to break up tough spots and ensure a thorough clean.
Filling in cracks with spackle or putty is the first step to achieving a smooth surface. Carefully apply the product, ensuring it fills in all the crevices and dries evenly. Sanding rough patches is next on the agenda, using coarse sandpaper for larger imperfections and gradually transitioning to finer grits for a seamless finish. Lastly, applying primer creates an even surface that prepares it for further artistic endeavors. Make sure to coat every inch of your smoothed-out wall before moving on to the next exciting step in wheat pasting posters!
Determining the appropriate size of your poster is crucial to ensure a seamless application. Measure and mark the dimensions on the wall accurately using a measuring tape or ruler. This will help you visualize how the final result will look and make any necessary adjustments beforehand. Applying sizing adhesive to increase adhesion is another important step in wheat pasting posters. It helps create a stronger bond between the paper and the surface, preventing peeling or bubbling over time.
Mixing the wheat paste is a crucial step in creating durable and effective posters. Begin by sifting the flour to remove any lumps or impurities. In a separate container, mix warm water with sugar until dissolved. Gradually add the sugar water to the flour, stirring continuously to create a smooth paste. Adjust the consistency by adding more water if needed. Finally, strain the mixture to remove any remaining clumps and ensure a fine texture for easy application.
Once you have mixed all of your ingredients together, it’s important to let the wheat paste rest for at least 30 minutes before using it. This allows time for it to thicken and reach its optimum consistency for pasting posters onto various surfaces. Remember that precise measurements and thorough mixing are essential for achieving an ideal wheat paste consistency that will hold up over time on outdoor installations or indoor displays alike.
Ingredients needed for wheat paste include wheat flour, water, and a pinch of salt. Using wheat paste has several benefits, such as being environmentally friendly, cost-effective, and providing strong adhesion for long-lasting posters. However, if you’re looking for alternative ingredients to make the paste vegan or gluten-free, tapioca starch can be used instead of flour with the trade-off of slightly weaker adhesion.

1. Start by preparing a thick paste by diluting wheat flour with water, ensuring a smooth consistency.
2. Using a brush or roller, evenly apply the paste to the back of the poster, making sure to cover all areas and edges thoroughly.
Choosing the Right Ratio:
Ensuring a Smooth Consistency:
Testing for Proper Thickness:
Using a foam roller or paintbrush, apply the paste to the poster in smooth strokes. Make sure to coat the entire surface evenly and generously, ensuring that no areas are left uncovered. Avoid excessive dripping or clumping by using just enough paste for each section of the poster.
Selecting an Ideal Location: Before positioning your poster on the wall, carefully choose a suitable location that will maximize visibility and impact. Consider factors such as lighting, surrounding colors, and the space available to ensure your message stands out effectively.
Securing Corners and Edges First: When placing your poster on the wall, start by securing the corners and edges with adhesive or tape. This will prevent any movement or slippage during the wheat pasting process, allowing for greater precision when aligning.
Aligning with Precision: To achieve a professional finish, take time to align your poster accurately before fully adhering it to the wall. Use a level or measuring tools to ensure straightness both horizontally and vertically. Attention to detail in alignment can make all the difference in creating an eye-catching display that commands attention from viewers.
Starting from one edge and working towards the others, use a squeegee or a flat object to gently press out air pockets when smoothing out bubbles or wrinkles. This technique ensures an even distribution of pressure throughout the poster, resulting in a smoother appearance. Take your time and be careful not to tear the poster as you work across its surface.
As you smooth out bubbles or wrinkles while wheat pasting posters, it is crucial to start from one edge and gradually move towards the others. By doing so, you can effectively minimize any air pockets that may form during the application process. Utilize a squeegee or a flat object to gently press down on the poster’s surface, ensuring that all areas receive equal attention for optimal results. Handle with care to prevent unintentional tearing along the way.
Once you have successfully wheat pasted your posters, there are a few important steps to ensure a polished final result. Firstly, carefully clean up any excess paste using a damp cloth or sponge. This will prevent the paste from drying and leaving unsightly marks on the poster surface. Secondly, allow sufficient time for the paste to dry completely before removing any protective coverings or moving the poster. This will ensure that the poster adheres properly and maintains its integrity. Lastly, protect your masterpiece by applying a clear varnish or sealant to prevent weather damage and fading over time.
Using a damp cloth, gently wipe away any excess paste to ensure a clean and smooth finish. Carefully scrape off dried paste using a plastic scraper, taking care not to damage the poster. For stubborn residue, remove it by wiping with warm soapy water.

Leaving the poster undisturbed in a well-ventilated area allows for proper air circulation, promoting faster drying of the paste.
Leaving the poster undisturbed in a well-ventilated area allows for proper air circulation, promoting faster drying of the paste. This helps to ensure that the poster adheres securely to the surface and minimizes any potential smudging or wrinkling.
To expedite the drying process, it is important to avoid exposing the poster directly to sunlight or excessive heat. Instead, choose a shady spot or an indoor area with controlled temperature. Using fans or blow dryers on low settings can also assist in speeding up drying time without compromising the integrity of the paste application.
Remember, allowing ample time for your wheat-pasted posters to dry thoroughly will ultimately enhance their longevity and overall aesthetic appeal.
Applying a thin layer of clear varnish over the poster once it is completely dry ensures added protection against moisture and fading. This protective coating acts as a barrier, preserving the colors and integrity of your artwork for longer.
To further safeguard your poster, consider covering it with a protective film before wheat pasting it onto surfaces. This transparent film acts as an additional shield, shielding your artwork from potential scratches or smudges during installation.
For extra reinforcement, place an additional layer of transparent adhesive tape around the edges of the poster. This simple yet effective step prevents any accidental tearing or peeling that may occur over time.
By following these precautionary measures in protecting your wheat pasted posters, you can ensure their longevity and maintain their visual impact for years to come.
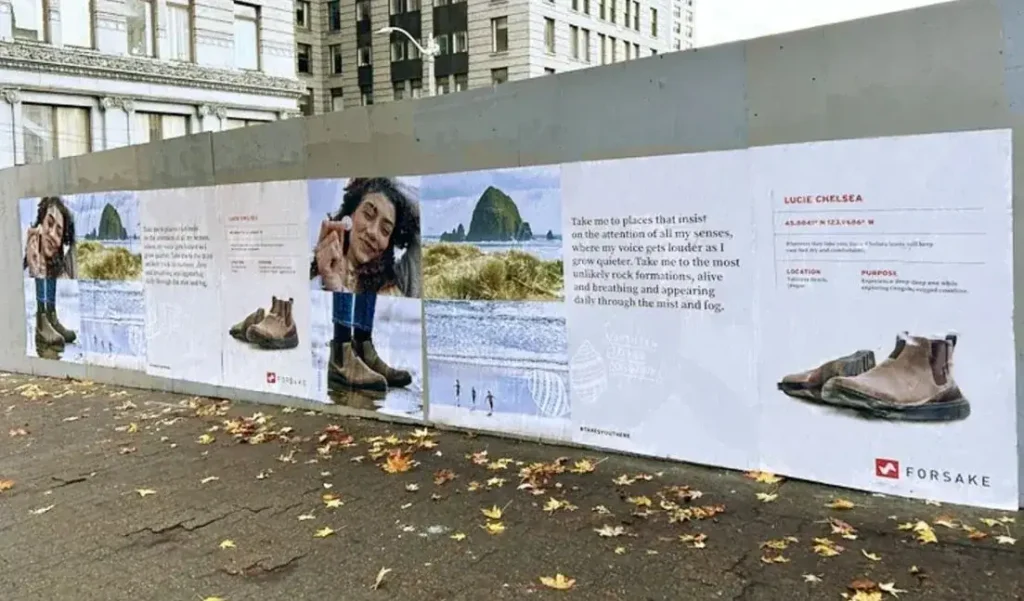
Maximize visibility: When wheat pasting posters, choose locations that have high foot traffic or are in areas where your target audience is likely to pass by. This will ensure maximum exposure and increase the chances of your message being seen.
Add depth to your artwork: Experiment with layering when wheat pasting posters. By using different images or patterns on top of each other, you can create a visually engaging piece that catches the viewer’s attention and adds depth to your artwork.
Get creative with stencils: Use stencils or cutouts to add intricate details or unique shapes to your wheat paste posters. This technique allows you to achieve precise designs and makes it easier for others to recognize your work.
Embrace collaboration: Don’t shy away from collaborating with other artists when wheat pasting posters. Not only does this foster creativity through shared ideas, but it also helps expand both yours and their audience reach, creating a win-win situation for all involved.
Considering visibility and foot traffic is crucial when choosing the right location for wheat pasting posters. Look for areas with high pedestrian activity, such as busy streets or popular public spaces, to ensure maximum exposure and impact. Additionally, always ensure that your placement complies with legal and ethical guidelines to avoid any potential issues or fines. Lastly, take into account weather conditions to make sure your posters will withstand elements like rain or strong winds, ensuring their longevity and effectiveness in reaching your target audience.
Mixing different poster designs can create an engaging composition that catches the eye. By layering posters with varying styles, colors, and imagery, you can achieve a dynamic and visually interesting result. Playing with opacity adds depth to your layers, allowing elements from each design to shine through and interact with one another. Using contrasting colors in each layer further enhances this effect, making them stand out individually while still contributing to the overall composition.
Creating intricate designs using stencils allows for precise and detailed artwork. By carefully cutting out shapes, patterns, or letters on a cardboard or plastic sheet, you can easily reproduce these designs on various surfaces. To add texture and dimension to your work, try incorporating cutout elements into your composition. These pieces can be layered onto the surface before applying wheat paste, creating a visually engaging piece of art.
Exploring different materials for stenciling opens up endless possibilities in your artistry. Using cardboard or plastic sheets as stencils provides durability and flexibility, allowing for repeated use without compromising the design quality. Additionally, experimenting with other materials such as acetate or metal can yield unique effects and textures in your finished work. Don’t hesitate to test out various materials to find the perfect fit for your artistic vision.
Combining styles and ideas is a powerful way to create unique artwork in collaboration with other artists. By merging different artistic techniques, we can achieve a cohesive final piece that showcases the diversity of our talents. Dividing the labor effectively allows for a more efficient process, where each artist can contribute their expertise to bring the artwork to life. Together, we can explore new possibilities and push the boundaries of creativity in wheat pasting posters.
Telegram: @americanguerillamarketing
Sign up to get blog posts here